You want to launch an
eCommerce store for your client?
You already chose the best website builder with all the greatest eCommerce functionalities?
Of course you did!
But before you’re ready to launch, you want to make sure you got everything you need.
Because once it’s live, customers are coming through the doors, and your online store better be able to convert them.
It would be quite dramatic to make your client lose sales because you forgot to set up proper payment gateways in your checkout process, or because your category pages are confusing.
So let’s just not, how about that?
We’ve compiled a launch checklist of everything you should check and recheck before you hit “publish”.
Let’s dig in!
Before you get started
Choose the right website builder for your needs
Make sure you’re using
the right platform to create your eCommerce website. There are thousands of website builders, eCommerce platforms and WordPress plugins out there, from the Shopify store to Amazon, WooCommerce, and many more.
Most solutions can help you create a few eCommerce stores without too many problems, however, if you’re an agency, you’ll want to start off with a tool enabling you to create multiple eCommerce websites, fast.
You want to be able to scale your business, and create hundreds of websites. You don’t want to spend hours on plugin updates, website maintenance and debugging.
That’s where
Duda comes in.
Duda is a website builder made for agencies.
It comes with tons of features that will help you save time (and money):
- Completely white label
- Easy client management tool
- Tons of easy-to-use templates
- Powerful but user-friendly editor
- Hosting, maintenance & SSL included
- Great SEO, speed, and performance
Try it out for yourself free of charge, and see if it fits your needs.
1. Create a unique homepage
The homepage is the very storefront of your client’s brand.
So you should create a unique, and highly converting page that represents them.
Make sure to follow
the eCommerce homepage best practices when designing it.
Here are a few things to keep in mind:
- Showcase your client’s brand (colors, logo, values, etc.)
- Focus on one clear CTA
- Showcase your client’s best-selling products
- Make sure key information is visible (phone number, shipping options)
- Ensure easy navigation to the products and promotions
2. Prepare standard information pages
It’s surely less exciting than designing the homepage, but information pages are quite crucial for an eCommerce store. Customers need to be able to find the info they are looking for, whether it’s shipping costs, payment options, address and phone number, or privacy policy.
Here are the pages you should make sure to prepare:
- FAQ page
- About us page
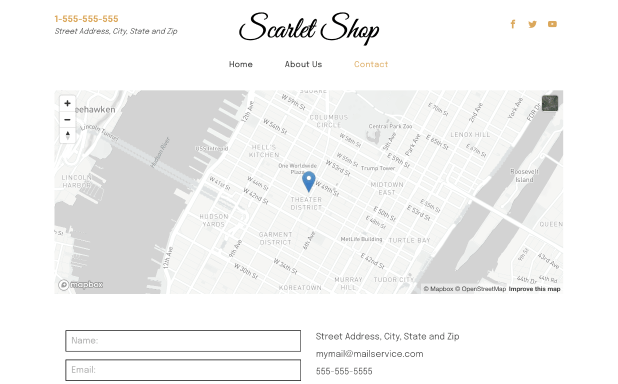
- Contact us page
- Terms of services page
- Privacy policy page
- Shipping and return policy page
It’s also a good idea to ensure these pages are easily accessible, the footer is usually a good place to put them. This way they don’t steal the spotlight but are easy to find for anyone looking for them.
3. Design product page
Can you even claim to be an eCommerce business without product pages?
That’s how essential these pages are.
You’ll want to create one product page per product you sell.
The most important thing to keep in mind? Make these pages as clear and descriptive as possible.
No confusion allowed.
Here are a few crucial things you have to include in your product page:
- Name of the item
- Product description: Include all information about the product, benefits, specs, dimensions.
- Price
- A clear CTA button to add to cart
- Product images
That’s the very basic minimum you need. But of course, there are numerous other elements you most likely should add.
Some best practices to keep in mind when designing your product page:
- Include related items below the product, the “You may also like”.
- Add a product review section.
- Provide multiple product images and angles (360-degree views) with the option to zoom in.
- Highlight potential sales or discounts.
- Be consistent across all your product pages; if you state dimensions in inches on one product, state it for all similar products as well.
- Include information on sizes and a sizing guide if needed.
- Provide an
Add to Wish List button on each product page.
- If needed, include how-to videos to explain how the product works.
- Clearly indicate if the product is sold out, and offer an area for people to sign up for notifications when the product becomes available again.
4. Design store catalog page
If you want users to navigate through all the products and basically “shop” online as they would in person, you can create a store catalog page.
It’s a page where all your client’s products can be showcased, the user then scrolls through it and clicks on whichever product they like to open the product page.
(source:
Ikea)
This type of page can improve the customer experience and be a good way to really show all the products as a whole. However it might not be the best idea if the store has hundreds and thousands of items, then it could cause confusion and users can find it difficult to find what they are looking for.
In this kind of page, less is more, so be sure not to present the same product multiple times (like the same water bottle in 5 different colors). Instead, present little dots of color on the top right of the item image to signify that it’s offered in different hues. You can also show pictures with different items in them like Ikea.
Present high-quality images of the items, and make sure they all fit well together. For example, if you’re selling furniture, you can divide it into different rooms: Bedroom, Living room, kids room, etc.
You can also divide it by collection (winter, fall, summer) or type of item (clothes, purses, jewelry) whatever makes the most sense for your client’s brand.
5. Create category page
Now that you have a trillion product pages, you need to classify them. Otherwise, how can customers find what they are looking for?
Category pages enable you to group different products together so it’s easier to find, for example, categories could be:
- Shoes
- Electronics
- On sale
- New arrivals
- Winter collection
You can then divide these categories into subcategories such as
- Shoes - Women’s shoes
- Electronics - Ipads
- On sale - BOGO
- New arrivals - Purses
- Winter collection - Winter coats
It’s important to think about how you wish to categorize your items in the best way possible for your users.
It needs to be easy for potential customers to do their online shopping on an eCommerce site, if they have to search too long, you may lose them.
So make sure to invest some time and think about how it would be best for your client’s products to be classified before you get into it.
6. Set up analytics tools
Knowing how your client’s eCommerce website performs is very important.
But how can you know, if you don’t track your data?
You can’t!
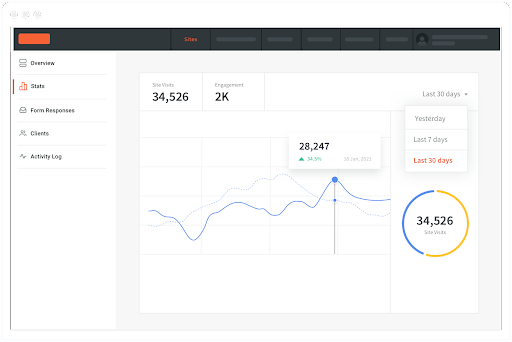
Before you launch your website, make sure to install all the analytics tools to help you track your performance data.
Tools such as:
- Google Analytics: to track your traffic, conversion rate, landing page performance, content marketing strategies.
- Google Search Console: To track your search engine optimization performance, keywords rankings
- Hotjar: to track clicks on CTAs, user experience data, web design performance, sitemaps.
- DashThis: to track your digital marketing campaigns, email marketing and social media performance.
You can also use the tools already provided with your eCommerce website builder.
There are numerous eCommerce KPIs to track to ensure a good performance of your website. Here are a few to keep in mind:
- Conversion rate
- shopping cart abandonment rate (abandoned cart)
- Average Order Value (AOV)
- Bounce Rate
- Total revenue
- Traffic (from organic and from paid)
7. Make the best of eCommerce SEO
Search engine optimization (SEO) is not just good for blogs and content dense websites, it’s also incredibly important for your eCommerce store.
eCommerce SEO is all about keywords related to your client’s products, so make sure to take advantage and optimize the website before launch.
Do a keyword research with terms related to your client’s online business and products for example:
- Handmade soaps, hypoallergenic soap, natural soap bar, wellness gift, natural bubble bath.
Once you know which of these are researched the most, make sure to include these keywords in the relevant product pages, usually in the product details section, you can also include them on your homepage, create landing pages, blogs, or add them to category pages. Don’t forget to add these keywords in your alt text and headers.
eCommerce website speed is very important as well, so make sure to use an eCommerce platform and website builder that’s already offering great performance for
Core Web Vitals (like
Duda).
8. Develop the site structure
Now is the best (and pretty much only) time to think about your website’s structure.
A good website structure should help users navigate seamlessly and convert into customers. It should also be sustainable through time.
For example, if your client now has just 3 different products, and you decide to showcase these products directly on the homepage with one page for each. It might work out great right now, but when they will launch 10 or 100 other products, this won’t be sustainable anymore.
So make sure the structure not only makes sense for right now, but for the future as well. This will save you a lot of time editing and tweaking in the long term.
You’ll also want to keep SEO in mind during this process, making sure you create a structure that helps your SEO efforts. Your domain name, URLs, categories, the type of pages you create and in what order can all influence SEO.
9. Optimize the design for conversion
There’s very few things as bad as an eCommerce store that doesn’t convert.
Conversion is the name of the game.
So make sure every important page (homepage, product page, catalog page, checkout page) is optimized to improve conversions as much as possible.
Here are a few key things to keep in mind:
- Have clear CTAs above the fold
- Showcase promotions within the pages.
- Include stock availability to incite users to buy before the stock runs out
- Add testimonials, reviews, awards and badges to establish trust with customers
- Showcase the best-selling products
- Offer various payment methods like credit cards, PayPal, Apple Pay.
- Offer chat customer support if possible, so that users have their questions answered right then and there.
10. Set up email automation
Make sure your users won’t be left hanging once they place an order. You need to set up automated emails to go out each time you get a new client so that they can be updated on the status of their order, and be aware of future promotions.
Here are a few emails the new clients
should receive:
- Welcome email
- Order confirmation
- Shipping confirmation & updates (with the tracking number)
- Cart abandonment (with a discount or not)
You can also send them
marketing emails to entice them to buy again throughout the year. Such as:
- Emails about new promotions and sales
- Emails about new products or updates
- Newsletters about the brand
11. Set up promotions and popups
Promotions are a very good way to entice people to buy. There are numerous types of promotions and discounts you can use to boost your sales. Here are a few:
- BOGO (buy one get one free)
- Buy one, get one at 50%
- 10-15-20-25-50% on everything / on select products
- Free shipping / Free shipping with orders of $X
- Extra % discount on sales items
- Coupon codes for extra discounts
Make sure to set them up on your site and ensure good visibility. You can create a banner on top of your header with the promotion, add pop-ups, or add carousel images to promote the sale directly on your website.
If you promote the sale with ads, emails or other external marketing efforts, make sure users are directed to either a landing page, or a page with a direct focus on the promotion. You don’t want your users to search for that promo.
Make it clear and obvious how to take advantage of the sale, for example: “Add coupon code XYZ50 at checkout” or “Promotion applied at checkout” so that your clients know what to expect.
12. Create a blog to add value
Adding a blog to your client’s eCommerce website can be a great idea to bring more traffic and sales.
You can reach a larger audience by answering their questions and providing useful information. For example, if your client sells climbing equipment, they can also have a blog about climbing best practices, techniques, the top spot to go climb, etc.
So people interested in climbing will encounter the articles, and then know and trust the brand to buy their equipment later. A blog is also a good place to showcase which equipment to buy for each type of climb for example, so you can convert readers into buyers right on the spot. It’s also a good place to upsell your recurring customers with new items by explaining how it will improve their lives or performances.
Of course, if you want this to work, you need to create articles that are optimized for SEO, so you can bring new visitors to your site regularly.
You can also include:
- Educational pages and tutorials to show how to use your products
- Lists that relate to your products
- Articles about your industry or niche
- Case studies, testimonials and interviews with people who have used your products.
13. Set up taxes and shipping information
There are a few things to set up in terms of taxes and shipping before you can safely launch an eCommerce website, you first need to ask yourself (or your clients) these questions:
- Taxes: What are the appropriate tax rates for your customers?
- Destination zone. To what location (country, state/county/region, city, zip code) will you allow delivery of your product?.
- Shipping method (carrier). How will you deliver your products (e.g. by mail, delivery guy, services provided from UPS, FedEx, etc, or it could be a local pickup)?
- Shipping rate. How much you will charge your customers for shipping.
Then, using your eCommerce tool, ensure that all this information is well configured.
14. Set up payment gateways
Payment gateways are another crucial element to configure before you even think of hitting publish.
A lot of customers prefer using payment gateways such as Apple Pay, Google Pay, Stripe and Paypal for express checkout. They usually like it because it’s faster or more secure, and it might be the only way they’ll want to provide payment online.
So make sure these are setup, and the more the better.
15. Perform tests
Last but not least, you have to test your eCommerce website.
Testing is the only way you’ll ensure the website works as it should before you launch it or present it to your clients, so it’s a crucial step.
You can first test the website by navigating through it and acting like a visitor that checks everything.
Make sure you test:
- CTA buttons
- Menu and navigation
- UX on desktop and mobile devices
- Contact page form
- Checkout process
- Payment gateways
- Automated emails
- Pop-ups and banners
- Analytics tools
You should also ensure the website speed and overall performance is up to par with different
web optimization tools.
Get started in minutes!
With this checklist on hand, you’re all set up to get started and create your eCommerce website.
If you’re looking for an eCommerce website template to kickstart the process and get most of these points out of the box, check out
Duda’s templates.
They are super easy to use and easy set-up for all your clients. You can even save your own custom template and re-use them for all your eCommerce clients. How time-saving is that!
Get started with Duda!
Related Posts
By Stephen Alemar
•
February 10, 2026
Discover the best eCommerce solution for your SMB clients Learn key criteria and compare platforms like Duda, Shopify, and BigCommerce to find the right-sized fit.
By Renana Dar
•
May 5, 2025
Many SMBs still hesitate to embrace eCommerce. As the agency partner, you have the opportunity to tear down the perceived walls of eCommerce and show clients how eCommerce can make their business more efficient, accessible, and profitable.
By Shawn Davis
•
October 15, 2024
With the holiday shopping season just around the corner, there’s never been a better time to focus on increasing your clients’ conversion rates. Uncover a few easy strategies you can implement today to do just that.
Show More


